Introduction
Last year, I wrote a tutorial on deploying a static website using Caddy. That was my first experience working with a Virtual Private Server (VPS) and Caddy. In that tutorial, I covered the steps necessary to configure a web server using both Caddy and Docker. However, I found that Docker is not essential for deploying a static website.
In this tutorial, I will demonstrate a simpler method for deploying a static website using only Caddy and the files for our website.
Although we are dealing with a static website, it’s important to recognize that updates will likely be necessary over time. For example, as I am currently writing this tutorial, I am preparing to update my website’s content. Therefore, understanding how to update our website effectively is crucial.
Deploying a Static Website
In this tutorial, I will write everything based on a Linux Ubuntu machine. If you are working on a different operating system, you may need to adapt the commands accordingly.
Step 1: Install Caddy
To install Caddy, you can use the following command:
sudo apt install -y debian-keyring debian-archive-keyring apt-transport-https curl
curl -1sLf 'https://dl.cloudsmith.io/public/caddy/stable/gpg.key' | sudo gpg --dearmor -o /usr/share/keyrings/caddy-stable-archive-keyring.gpg
curl -1sLf 'https://dl.cloudsmith.io/public/caddy/stable/debian.deb.txt' | sudo tee /etc/apt/sources.list.d/caddy-stable.list
sudo apt update
sudo apt install caddy
To make sure Caddy is installed correctly, you can run the following command:
caddy versionIt should display the version number of Caddy. For example:
v2.9.1 <random string>Step 2: Take a look at the current configuration
After Caddy is installed, a Caddyfile file will be automatically created in your server. In my case, it is located in the /etc/caddy/Caddyfile directory. Before we begin making changes to the Caddyfile, it is recommended to see what it currently looks like by running the following command:
cat /etc/caddy/CaddyfileThe output should look something like this:
# The Caddyfile is an easy way to configure your Caddy web server.
#
# Unless the file starts with a global options block, the first
# uncommented line is always the address of your site.
#
# To use your own domain name (with automatic HTTPS), first make
# sure your domain's A/AAAA DNS records are properly pointed to
# this machine's public IP, then replace ":80" below with your
# domain name.

:80 {
    # Set this path to your site's directory.
    root * /usr/share/caddy

    # Enable the static file server.
    file_server

    # Another common task is to set up a reverse proxy:
    # reverse_proxy localhost:8080

    # Or serve a PHP site through php-fpm:
    # php_fastcgi localhost:9000
}

# Refer to the Caddy docs for more information:
# https://caddyserver.com/docs/caddyfile
Step 3: Modify the Caddyfile
Our main goal in this tutorial is to deploy a static website using Caddy so that anyone can access it from their browsers. To do this, we need to make some changes to the Caddyfile.
At this moment, we haven’t created a directory for our webiste. For now, we will focus on preparing the webserver configuration (i.e. Caddyfile) and assume that we will later put the files for our webiste in this directory: /var/www/yourdomain.com.
As you can see what we have in the Caddyfile now, there is a few line of codes that are not commented.
:80 {
    # Set this path to your site's directory.
    root * /usr/share/caddy

    # Enable the static file server.
    file_server
}
Now, we only need to change 1 line of code, that is the 3rd line. We need to change the path to our webiste from /usr/share/caddy to /var/www/yourdomain.com. Now, the updated version of our Caddyfile should look like this:
:80 {
    # Set this path to your site's directory.
    root * /var/www/yourdomain.com

    # Enable the static file server.
    file_server
}
Step 4: Prepare the files for our website
Now, we need to prepare the files for our website. In this case, we will create a new directory named yourdomain.com in the /var/www/ directory and a single index.html file in the directory.
mkdir /var/www/yourdomain.com
touch /var/www/yourdomain.com/index.html
Let’s open the Vim editor to edit the index.html file:
vi /var/www/yourdomain.com/index.htmlPut a simple content in the file, such as:
<!DOCTYPE html>
<html lang="en">
<head>
  <meta charset="UTF-8">
  <meta name="viewport" content="width=device-width, initial-scale=1.0">
  <title>My Portfolio</title>
</head>
<body>
  Welcome to my Portfolio Website!
</body>
</html>
Step 5: Deploy your website
Now, all the configurations are ready. We can deploy our website by executing the following command:
# go to the Caddyfile directory
cd /etc/caddy

# save the configuration
caddy adapt

# start the webserver
caddy start
Step 6: Access your website
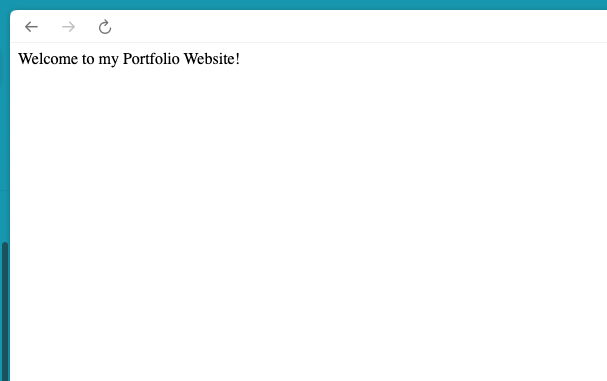
Now, anyone who knows the public IP address of your server can access your website. For example, if your public IP address is 203.0.113.10, you can access your website by visiting http://203.0.113.10 in your browser.
It will look something like this:
